Socca
My adventures with chickpea flour began in Binn Inn, one of my favourite retail locations. It’s the perfect combination of thrifty spending and food shopping that leave me positively glowing with pleasure and virtue.
On this particular occasion, my sister and I had made a special trip to Binn Inn as part of a birthday outing, in which she also very generously shouted me high tea at the gorgeous Sweet Pea on Petone High Street.
As we poked about in the bins and bottles, she alerted my attention to a large vat of chickpea flour, promising ‘I have a nice recipe for this stuff.’ Not one to turn down a new recipe, particularly one which involves a purchase at Binn Inn, I found myself in possession of my sister’s lovely Socca recipe and now, dear reader, is your chance to read all about it.
Socca is flatbread made from chickpea flour. This lovely dish also goes by the names of Farinata, Cecina and Faina and is found in Italy, France, Agentina and Uruguay.
Chickpea flour, I suppose, does not look terrifically exciting in its raw form, although I can assure you it has a rather pleasant nutty smell.
To turn a little pile of chickpea flour into delicious Socca according to my sister’s recipe, you will need:
1 cup of chickpea flour
1 cup of water
1 tablespoon of olive oil
1 teaspoon of salt.
Method:
Add all the above ingredients to a bowl, mix them together and leave them for about half an hour so the chickpea flour can absorb some water.
Heat up the grill at quite a high heat.
Heat an oven-proof frypan on the stove top and once hot, add a fair bit of olive oil and swirl it around to grease the pan (I say ‘a fair bit’ as my first attempt, sadly, did not involve enough olive oil and I wound up forlornly picking bits of my flatbread off the pan).
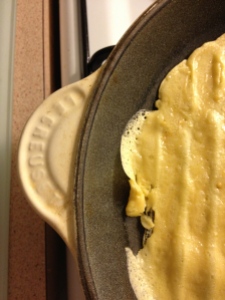
Pour in a third to a half of the batter and treat it like you would a crȇpe – swirl it around to cover the base of the pan.
Leave it cooking a few minutes. Mine developed some cute little pancake-like frills as I did this.

Then, put the pan under the hot grill until it bubbles and blackens slightly. Once it has coloured and bubbled evenly over the surface, you’re ready to go – pull it out and enjoy.
My sister included the following piece of advice about this stage: ‘DO NOT hold the handle of your frying pan with your bare hand. I did and it burnt me. OUCH.’ And for this, I can recommend my cute little green potholders, modelled below. They offer a bit more grip and flexibility than your average cloth potholder, with their clever ridgy-bits.
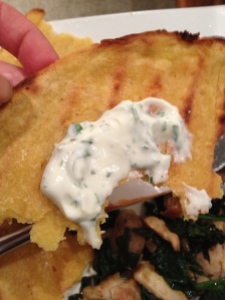
I served my flatbread with pan-fried chicken thighs, spinach and pine nuts, and a smudging of my Parsley and Mint Yoghurt Sauce. The internet tells me they are often served with fresh rosemary, pepper and sea salt which sounds utterly scrumptious, and given the fact I am nurturing a small rosemary bush in my new garden, I will be trying this combination soon.


